Construction and safety
Your assembly instructions will be sent along with your order in the enclosed screw bag. In the unlikely event that you do not receive your instructions, please use our contact form to get in touch with our customer services team. We will send them to you as quickly as possible.
Experience shows that with a second pair of hands and our detailed instructions, assembly is quick and easy: roughly speaking, and depending on your DIY skills and the preparation of all the necessary tools, you will need around 6-8 hours to assemble our smallest climbing frames, without setting them in concrete. For our largest climbing frame, we recommend finding two helpers. Then it should be ready in 10-12 hours. And once your friends are there, they can also stay to celebrate the grand opening.
The boards and posts have been sawn ready for use, and simply need to be sanded at the edges to avoid splintering. All the necessary screws, including covering caps, are included in your delivery. For assembly, you will require the following tools:
 |
||||
|---|---|---|---|---|
| Screwdriver | Spirit level | Rubber Mallet | Try square | Wrench set |
Tips: Ensure that you use the correct bit size when fastening the screws provided to avoid premature rust and damage.
Pre-drill the holes before inserting the screws. This minimises the risk of damage to the alloy of the screws.
Ensure that the there are no parts missing from the delivery and that items are undamaged before you contact the assembly service. That saves effort, time and costs, and your helpers can get to work without any hassle.
If you have ordered a climbing frame featuring a wave slide with a water connection, you will need a drill with a diameter of 4mm and a minimum length of 5cm for assembly. You'll also need fine-grain sandpaper to sand off any burrs created on the surface of the slide. A 1/2-inch hose and hose clip are also required for the connection.
Note: Please be aware that only our 175 cm, 220 cm and 300 cm wave slides have a water connection.
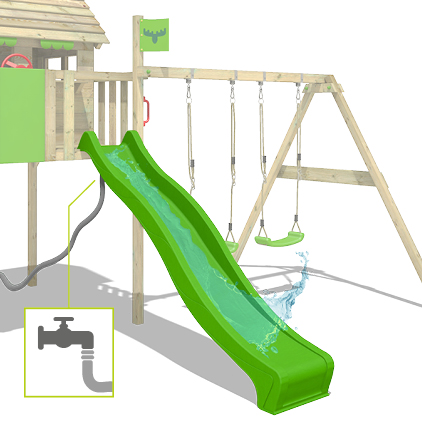
On the reverse of the slide, there is a fixture that marks the position of the water connection. Guide the drill bit through the small pipe from beneath and start to drill the hole. The burrs created can be removed by positioning the point of the drill head. Any remaining sharp edges can be carefully ground down using fine sandpaper. Tip: when sanding, do not exert too much pressure, to avoid scratching the slide. Then screw the half-inch hose onto the connection tube and fix it with the hose clamp. Let the water fun commence!
You should build your FATMOOSE playground equipment on an even surface. Grass or sand with enough space around the equipment is ideal. On solid ground, it is recommended that you lay out safety mats.
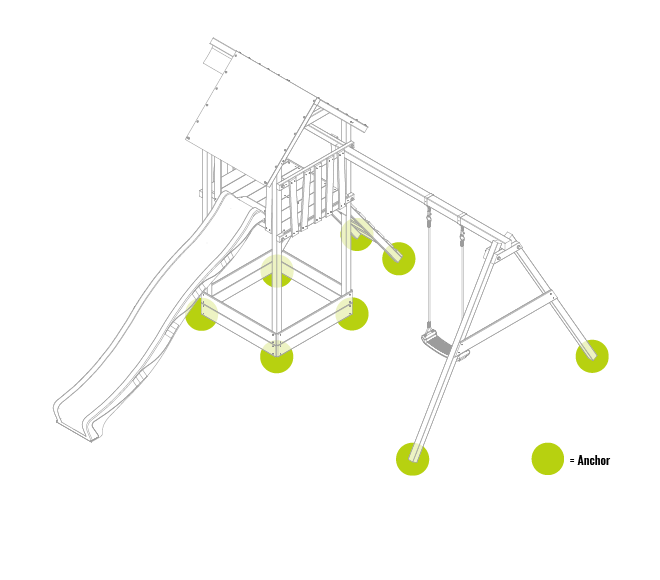
Even if the playground equipment if stable and safe, we always recommend anchoring your playground equipment in the ground to ensure your children's safety. Your climbing frame or swing will become even more stable once you anchor it! All anchors are screwed to the climbing frame posts and — depending on which type of anchor you choose — cannot be seen from the outside. In general, we recommend that all posts leading to the ground are anchored in the ground. Ladders and climbing walls should also be fixed with two anchors each. You can find more information in the respective product descriptions.
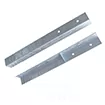
Tip: Our angle anchors are perfect for every climbing frame
You have to order anchors in addition to your playground equipment. Take a look at your product's product page. There you can find recommendations about the type and number of anchors that we recommend for your climbing frame.
 |
 |
 |
|
|---|---|---|---|
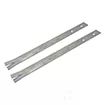
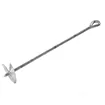
| SolidRoot Angle anchors | SimpleRoot Ground anchors | QuickRoot Ground anchors | |
| Square beams/slanted |
|
|
|
| Suitable for swing beams? |
|
|
|
| Loose, sand-like ground? Always set in concrete |
|
|
|
| Firm, stony ground? Setting in concrete optional, but recommended |
|
|
|
| Assembly tips |
|
|
|
| Stability |
|
|
|
*Tip: mount on the inside so that the ground anchor is not visible from the outside
A foundation plan is not necessary as our playground equipment is first fully assembled and then set in concrete in its final place. You can find more information about the construction of the basic frame in the question "How is the base frame constructed and how are the anchors set in concrete?".
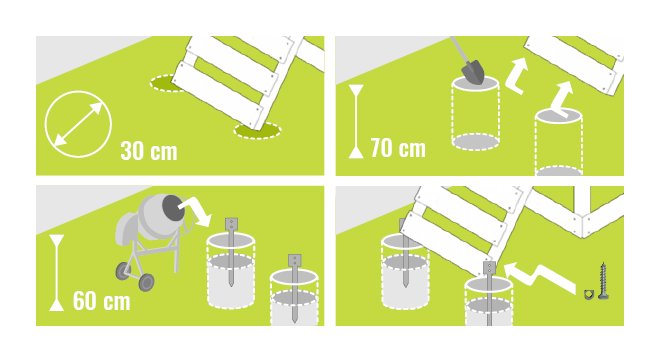
Proceed as follows when concreting in the anchors/erecting the base frame:
- Assemble the base frame and place it in its final position. Please observe the safety distances indicated in the installation instructions.
- Stake out the places around the posts where the base frame is to stand. Position the base frame so that all holes can be excavated easily. Tip: the holes should be approx. 70cm deep and have a diameter of around 30cm.
- Mount the anchors on the inside of the posts.
- Place the basic frame into its final position.
- The climbing frame must be horizontally level. You can use stones or wooden wedges to achieve this.
- Pour the ready-mixed concrete into the holes until they are filled to approx. 60cm. Make sure that only the anchors are covered with concrete, and that the posts remain free.
- When the concrete has set, you can fill in the rest with topsoil.
Please ensure that the supporting posts of your climbing frame are in contact with the ground when concreting them in. Correct anchorage is necessary for the stability of your climbing frame and helps to prevent danger spots. It also protects your screws from premature rusting.
Obstacles such as trees, hedges or walls are not only a nuisance when playing, they also pose a great risk of injury. To ensure safe and carefree play, we therefore recommend a safety distance of at least 2 metres around the entire playground equipment. Always use the outermost point or the outermost posts of the climbing frame or swing as reference points.
To reduce the risk of injury, we recommend laying out safety mats. Our safety mats have a surface area of 50x50 cm. We recommend laying out at least
- 2 in front of every slide
- 4 in front of every climbing wall/ladder
- 4 under every climbing rope/net
- 4 under every rope ladder
- 6 under every swing seat
SurfSwing: +4 additional mats
TowerSwing: +12 additional mats

Our FATMOOSE assembly service is currently only available in Germany, Belgium and the Netherlands (excluding islands).
Simply ask around your friends and family members. Perhaps one of them is a talented builder. Of course, you could also ask a gardener or landscaper. They usually offer assembly services for garden play equipment.


